More and more people are looking to install artificial turf themselves. This growing segment of the marketplace is more than capable of installing synthetic lawns that look just like an expert installed them. Before a do-it-yourselfer takes on a project that will most likely be a permanent fixture in their home, they need to understand the basics of getting the job done right the first time. If you follow these ten easy steps you will be happy with your results.
Step One: Plan, Think, Decide.
What is your plan for your yard? Is this a backyard installation with little to no traffic or will this be a heavily trafficked area used by pets and children? If you are planning on using your new yard for pets you may not want to install a weed barrier. These permeable membranes are notorious for capturing the scent of animal urine. If you are going to walk on the turf often and do so barefoot you may not want crumb rubber infill. This infill is easily noticed as it is black and hot to the touch. In the sun, the crumb rubber gets really hot.
Step Two: Measure and then Measure Again.
If you are installing turf in a perfectly square or rectangular area your installation will go over far more smoothly then if you are installing turf in an irregular area, for example a kidney shaped lawn. It is important to understand that the turf itself comes in rolls that are 15 feet wide. Waste is a serious factor in turf installations so making sure you measure the area correctly can save you a great deal of money. Turf is typically ordered from a factory by the linear foot. Since the turf comes in 15 foot widths, each linear foot is equal to 15 square feet.
Step Three: Required Materials.
There are a number of materials you need to order to get the job done right. Here is a list of the most common materials:
(1) Class II road base or decomposed granite used as a base. Your base should fill the excavated area to approximately three inches after it has been compacted. You will need approximately one ton of class II road base or decomposed granite per 100 square feet of installation area.
(2) Gopher wire if necessary. If you have gophers you will want gopher wire. Install the gopher wire under the base material. Many people think that gophers will not dig up artificial turf because it is…well…artificial. This is definitely not the case. Gophers are crafty little varmints that need to be punished by you…with gopher wire. The real danger that the gophers pose are sinkholes. The gopher wire insures that when the nasty little critters tunnel under the turf, sinkholes won’t appear.
(3) Weed barrier if no pets will use the area. You can buy weed barrier at most any hardware store. Make sure the barrier you buy is permeable! The biggest mistake some do-it-yourselfers make is buying the non-permeable plastice weed barrier. This does not drain at all and if installed you will need to tear out your turf.
(4) Sod Staples and/or four inch galvanized nails. 
(5) Infill. You can use silica sand, crumb rubber, or special synthetic products readily available from most turf companies referred to as Durafill and FlexSand. Most people that install turf themselves use the silica sand as it is widely available. The other artificial infill products are typically only available from turf suppliers. When using silica sand as an infill, make sure you order 1.5 pounds per square foot minimally and 3.0 pounds maximally.
Step Four: Go Shopping.
The silica sand and the base are very inexpensive. What can cost you a lot of money is the turf itself, gopher wire and sometimes the weed barrier can be pricey. Call around to a number of suppliers and get the best price. Make sure you can coordinate delivery in a manner that will facilitate easy install.
Step Five: “Get ‘er Done.”
Begin the excavation. Make sure that the area you excavate is graded smooth.
Lay down gopher wire if you need to. You can secure the gopher wire with sod staples easily.
Add the road base or the decomposed granite. Tamp the base down and use a heavy roller to smooth the top of the base or granite. Here is a picture of a heavy roller: 
Once the base is graded smooth, you can lay weed barrier. If there is no weed barrier then move on to the turf.
Cutting turf to fit irregular shapes can be difficult. We suggest laying the turf out and trimming the edges slowly, making sure that when you make cuts the area left remaining will be more than required for the area, our point being, it is better to cut the turf larger than necessary than to cut the turf too much leaving major gaps.
Once the turf is cut and laid down secure it with the sod staples and/or galvanized nails every three inches around the seams and the perimeters. You do not need to use staples in the middle of the turf as the infill should hold the turf in place. In addition, the turf can expand and contract due to temperature variations so giving it room to move is a good thing.
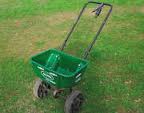
After the turf is secure use a fertilizer spreader to spread out the infill. 
You will need to gently rake the area that you place the infill into to help it settle down.
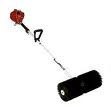
Once the infill is in place, you can use a broom or rent a power broom from a local store that rents specialty tools to contractors. 
Using the power broom once a month will make your turf look great in the long term.

Recent Comment: (1)
Ron Birtch March 17, 2013
Do you sell the power broom for homeowners? If so, how much?
Thank You,
Ron
Leave a Reply